How can I schedule analytics report delivery in my mailbox?
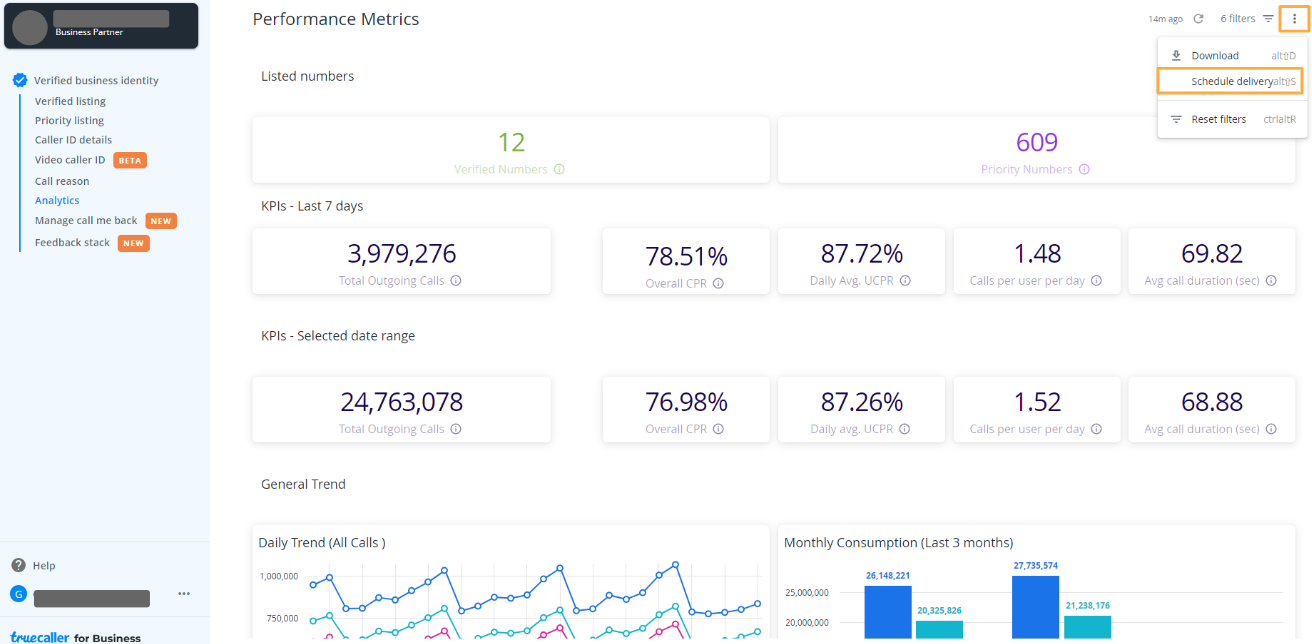
Step 1: Reports can be scheduled by clicking on the three-dot menu in the right-hand corner of the dashboard.
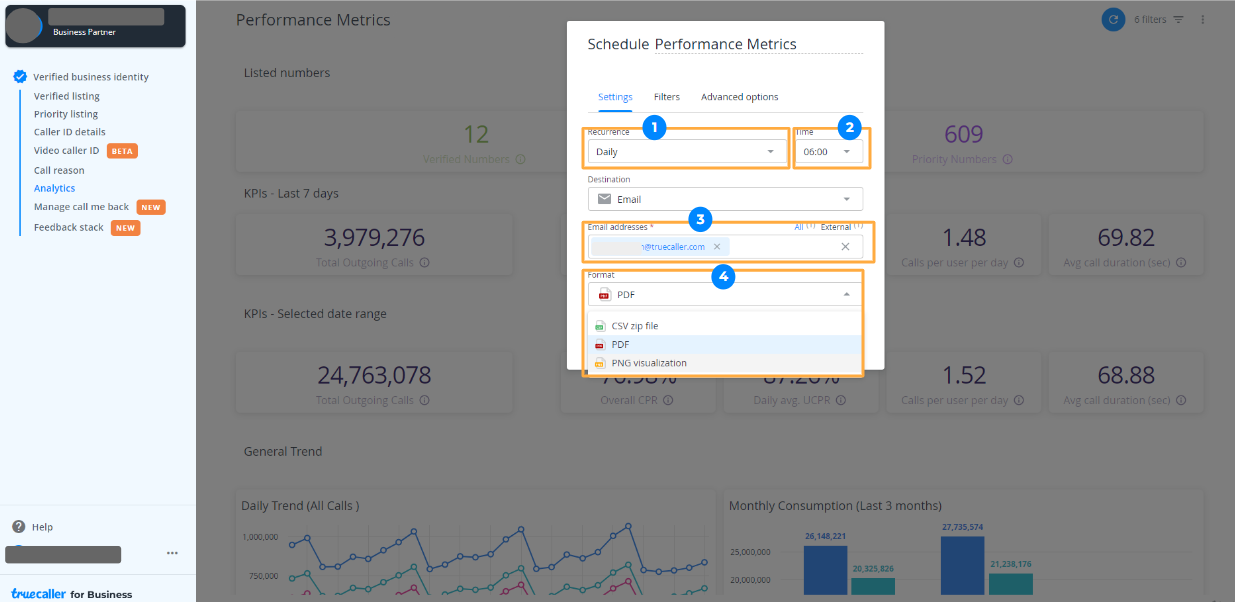
Set Frequency: Report frequency can be set as daily, weekly, monthly, hourly, or custom.
Time: Specific time can be selected to schedule the report.
Receiver Email: You can add the email addresses of every recipient who should receive this report. You can also add people not added as users on your account
Report Format: Reports are available in three formats:
PDF
CSV
PNG image file
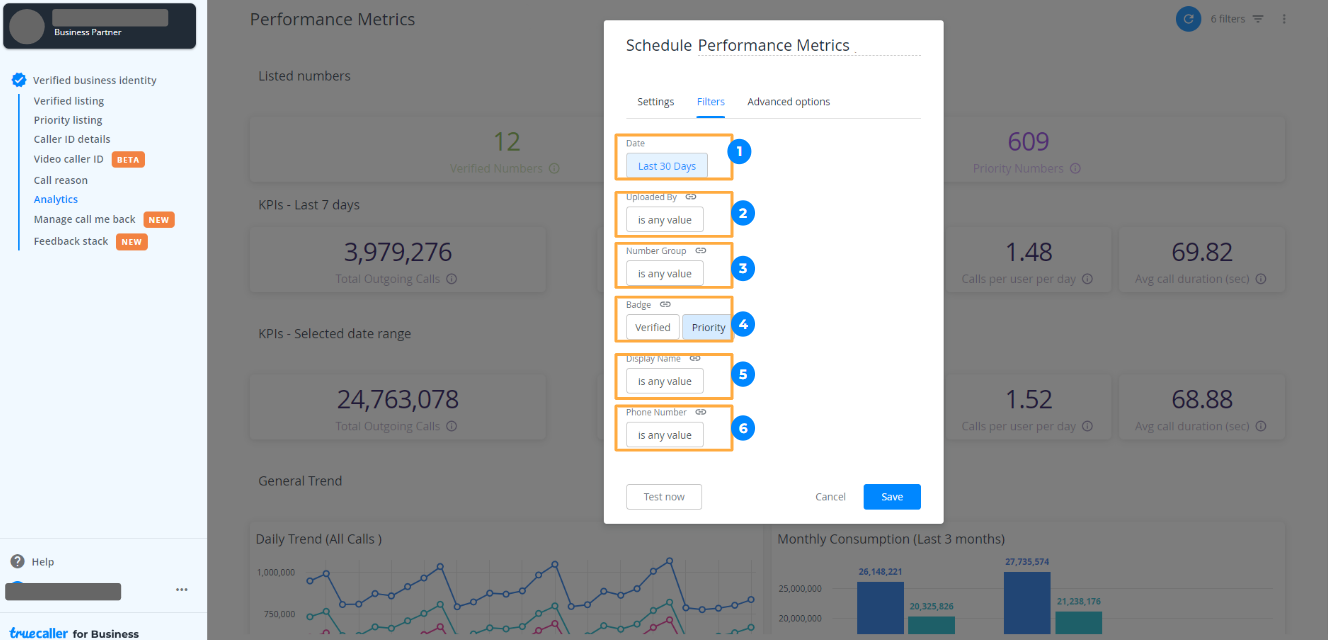
Filters are also available to customize the reports as per business consumption.
Date Range: To define the date range of the report.
Uploaded by: This filter helps to sort the report according to users who have uploaded a specific number.
Number Group: Sort the report basis Number Groups.
Badge: Filter the report based on the Verified or Priority Badge.
Display Name: Filter as per the Caller ID being used.
Phone Numbers: Filter basis on each number uploaded.
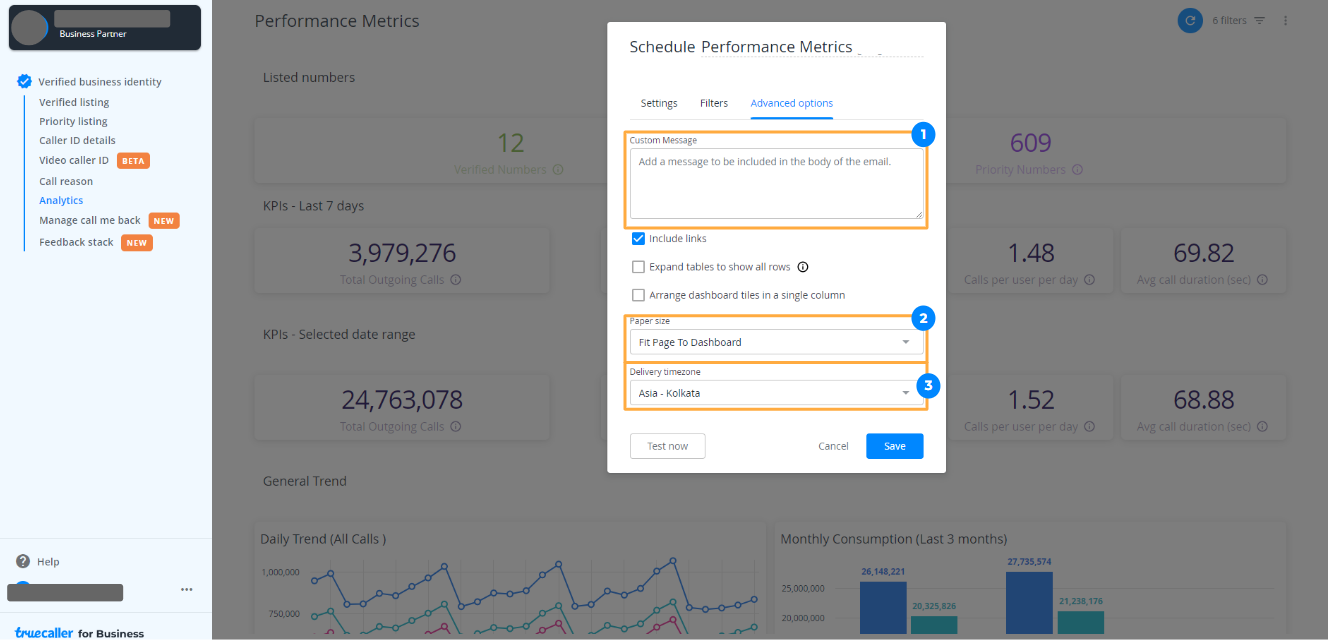
The scheduling functionality also has some advanced options:
Custom Message: A custom message can be added to the email report to add more context for the receivers.
Paper Size: This option is available to customize the size of the report; various options are available like A4, Letter, A1, etc.
Delivery Time zone: Time zone customization is also available to schedule reports.
Related Articles
How can I download a report from the analytics dashboard?
Step 1: Reports can be downloaded by clicking on the three-dot menu in the right-hand corner of the dashboard. Step 2: The Download option will be available in PDF and CSV format.What insights are available on the analytics dashboard?
The analytics dashboard has multiple reports enabled based on the features that are linked to your plan, each covering comprehensive insights to help you up your calling game. Performance Metrics: In this report, get a snapshot of your overall ...When will the analytics dashboard update?
The analytics dashboard updates every 24 hours. And there is a latency of 24 hours like any other standard analytics product/module available in the market.Where can I find my Call Reason analytics dashboard and what does it cover?
Call Reason analytics can be found on the third page of the analytics dashboard. You can select the third page to view Call Reason analytics. Details covered in the Call Reason analytics dashboard:Where can I access my calling insights on the analytics dashboard?
Please click on “Analytics” in the left navigation menu to access calling insights.